If your pump is the heart
of your pool or spa the filter is its kidneys. Daily, your filter removes dirt,
oil, organic and inorganic substances. Having clean, healthy water is
dependent on your filter operating at its peak performance and that is with a
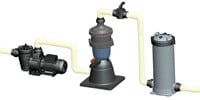
clean filter. There are three types that are used in pool and spa applications,
Sand, Diatomaceous Earth (D.E.) and Cartridge.
The specific systems we will address in this
post on how to clean a
pool filter all have unique issues when it comes to diagnosing, servicing and
resolving dirty filters. Back-washing any of these filters isn’t a panacea, it
only gives you some time before you can manually clean it.
Before you take on the task of cleaning your
filter, it is important to make sure your pump does not turn on while you are
in the process. The high pressure put out by your pump can cause injuries and
possible death. Turning off your timeclock is not enough, remove the lid on
your pump where the basket is located.
Sand Filter
This is Mother Nature’s way of cleaning water.
Sand Filters should be manually cleaned at least once per season. If you did it
upon closing, you will start your season off easily. For many of the small
filters up to about 22” it is easier to just dump and add fresh sand. Many
filters have drain ports in the bottom of the filter which allow you to let the
sand out the bottom and onto the floor. This creates a mess but, it’s just a few
hundred pounds of sand that can be scooped up with a shovel and discarded. The
use of a shop-vac for removal and clean-up also works well. The larger filters
from 24” on up can use this same approach but, you are removing 300 to 700
pounds of sand and dumping it or sucking it out with a shop-vac.
Cleaning Sand
Sand doesn’t wear out, it gets clogged with dirt
and oils, it channels and gets hard and crusty. Backwashing does not clean as
well as manual cleaning and it can’t break loose or clear out the hardened
sand. Cleaning the sand bed MAY be a solution for you. For filters 26” to 36”
you may want to do this once or twice a year.
1. Backwash the filter for several minutes
until the water comes out clear.
2. Gain access to the top of the filter by removing
the lid or backwash valve. If you have a top mount valve, cover the standpipe
with some duct tape.
3. Using a nozzle on a garden hose, agitate the
sand all the way to the bottom and especially the sides. Break up clogs of oil
and dirt and hard compacted sand as you scour the sand bed. You want the sand
to move freely in the filter as you scour the sand bed. You will feel this with
your fingers as you move through the sand.
4. At this point you have a choice...
If your
sand is really dirty soak the sand overnight in a cleaning solution such as
ClearView Filter AID or basic Trisodium Phosphate (TSP), scour again the next day.
If you
cannot get the sand clean don’t fight it, replace it!
5. When you are finished, put the lid back on
and backwash the filter until clear water flows to waste. You should do this
especially with new sand.
Inspect
the air relief tube and or air sock before assembly, missing or damaged parts
will allow sand into the pool.
Your filter needs to have a working pressure
gauge on the top. Take note of the pressure reading on the tank with a clean
filter and store that information somewhere you can reference later.
Diatomaceous Earth (D.E.) Filters
Backwashing
D.E. Filters does not remove all of
the dirt. The first time you backwash these types of filters about 80% of the
dirt will be removed. The second time about 60%. Each consecutive backwashing
results in less dirt being removed. The accumulation of D.E. inside the filter
eventually fills the void between the grids or cartridges. This causes pressure
on the plastic frames and cartridges which causes them to collapse. Backwashing
a D.E. Filter does not eliminate the need for disassembly and a manual cleaning.
There are two types of D.E. Filters - grid and
cartridge. Cartridge
D.E. Filters are not the same as Cartridge Filters.
Removal of D.E Filter Grids and Cartridges
Removal requires the
disassembly of the filter top from the base. Manufacturers use several
different methods to mate the two halves.
- A band clamp uses a
circular formed assembly that will have either one or two fasteners (nut and
bolt or knob) that when tightened will squeeze the two halves together.
- A twist lock ring will be a
circular assembly that fits over the top and mates to tabs on the bottom of the
filter. Twist lock mechanisms will have tabs on the outer ring that need to be
depressed while turning the ring on or off.
- Sta-Rite uses a 3-tab assembly with t-bolts and knobs.
- Some older units you may find nut and bolts around the
edge of the tank.
Once you’ve removed the filter top take a
picture of the assembly for reference. If you have never done this before, take
pictures as you disassemble. Now you can disassemble the filter grids from the
manifold.
Top Mounted D.E. Assemblies
Will have a manifold
that has eight ports for the grids and one large one for the stand pipe in the
filter. This whole assembly lifts straight up and out. Pay attention to how the
grids are positioned in the manifold as there is one short one that MUST be in
its correct position when assembled. Normally there is one long threaded rod
that goes through the center of the assembly that squeezes the manifold to the
spreader assembly on the other side. Set the assembly on the ground standing
upright paying the utmost attention to the void where the standpipe must go when
assembled. Remove the nut from the long rod and remove the spreader followed by
each individual grid.
The
spreader is on the top, with the manifold remaining attached to the bottom
during disassembly. Remove the nut, spreader and remove all eight grids, leaving
the manifold in the filter. When you assemble, a bit of
silicone lube spread around the nipple of the grids will make removal the next time
easier.
Quad D.E. and D.E. Cartridge Filters
Remove the lid and do not lose the compression
spring or spacer. Remove the assembly from the filter by lifting up and out,
then disassemble the cartridges from the two manifolds while it’s on the ground.
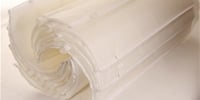
Cleaning Filter Grids
- Hosing the muck from the grids with a nozzle on
a garden hose should get you down to the fabric covered grids. A scrub brush or pool brush with a bit of dish soap or Trisodium Phosphate (available at hardware stores) should get
you to a respectable level of cleanliness.
- If the grids have oils and dirt impregnated into
the fabric, soak them overnight in a container with one of our filter cleaners.
- Inspect filter grids carefully for holes, tears and
collapsed plastic internal frames. If they are damaged, you will need to
replace them. Failure to do this will result in D.E. coming back into the pool.
An opening or a tear in the fabric as small as a pencil lead will allow D.E. to
come back into the pool. It's always a good idea to keep a backup set on hand so that you have them when you need them. If you're stuck waiting for replacements, here's a tip...A good dab of
PVC glue to cover the tear will hold until your new grids arrive.
- Rinse the filters well before assembly.
- If you're working on top
mount filter grids, before assembling the grids into the manifold, pull the
fabric down on the nipple. This helps to create a seal so D.E. doesn’t return
into the pool.
- Inspect the standpipe for an O-ring near the
top, if it’s missing there will be a groove where it should be. A missing O-ring will let D.E. back into the pool.
It is a good practice to have a replacement tank O-ring on hand
before disassembly.
- When you assemble the filter halves together be
sure both halves of the tank are clean.
- Inspect
the air relief tube and or air sock before assembly, missing or damaged parts
will allow D.E. into the pool.
After you assemble the filter, make
sure the air relief valve is OPEN before you turn on the pump. Water as it
enters the tank compresses air which is dangerous. Water doesn’t compress, so
you will eliminate a potentially dangerous situation as your filter fills with
water.
Recharge your filter by adding the correct
amount of D.E. in a bucket of water to create a slurry, adding it slowly into
the skimmer with the pump on will help establish a uniform coating on the filters. Check out our blog post on
adding D.E to your pool for more information.
Your filter needs to have a working pressure
gauge on the top. Take note of the pressure reading on the tank with a clean
filter and store that information somewhere you can reference later.
Cartridge Filters
While cartridges for D.E. Filters are designed to be backwashed, cartridges for
Cartridge Filters are not. Cleaning either style cartridge is basically the same, so many of the steps below will mirror what we've outlined for D.E Filters.
Removing Cartridges
Removal requires the disassembly of the filter
top from the base. Manufacturers use several different methods to mate the two
halves.
- A band clamp uses a
circular formed assembly that will have either one or two fasteners (nut and
bolt or knob) that when tightened will squeeze the two halves together.
- A twist lock ring will be a
circular assembly that fits over the top and mates to tabs on the bottom of the
filter. Twist lock mechanisms will have tabs on the outer ring that need to be
depressed while turning the ring on or off.
- Sta-Rite uses a 3-tab assembly
with t-bolts and knobs.
- Some models will use a
threaded rod in the center with a knob to squeeze the lid onto the tank.
CAUTION: Cartridge type filters may have a
compression spring or a spacer inside the filter top, be careful you do not
lose or misplace it. It is required to keep your cartridges from floating
inside the tank.
Once you’ve removed the filter top, take a
picture of the assembly for reference. If you have never done this before take
pictures as you disassemble.
Single Cartridge Filters
Many of the smaller, single cartridge type
filters are pressed down onto a raised nipple in the base of the tank. There
may or may not be a threaded rod in the center that extends through the cap
with a knob to squeeze the assembly together. Some manufacturers use a center
plastic core that the filter slides over to complete the assembly. These
cartridges lift straight up and out, and the core may come out with the
cartridge to be separated once out of the tank.
Multiple Cartridge Filters
These filters have two methods of assembly, a
top manifold and a bottom manifold. Most will have a spreader and a manifold.
The
Sta-Rite 3 Modular Media Filters use a bottom manifold with no spreader.
For top manifold filters, the manifold will have
a port for each cartridge and a port for the standpipe. The spreader is
attached to the bottom of each cartridge. This whole assembly can be lifted up
and out of the tank. The cartridges are a press fit onto the manifold. The spreader sometimes will come apart when disassembling them. Inspect the standpipe near the top for an O-ring, if it’s missing from the groove, the gap will
allow dirt to bypass the cartridges.
When you assemble the clean or replacement
cartridges to the manifold and spreader, press them firmly into place, paying
attention to the space needed for the standpipe. You can’t get it wrong; it
will only assemble correctly one way! It is always recommended to have a new
tank O-ring on hand before disassembly.
For bottom manifold filters, the spreader can be
removed from the cartridges first. This allows you to remove the cartridges one
at a time without removing the manifold. Bottom manifold filters are much
easier to service as the cartridges can be inserted onto the manifold one at a
time instead of lifting the entire cartridge assembly into the tank. It’s a
good idea to remove the bottom manifold for cleaning the tank and to inspect
for O-rings that may be broken or missing.
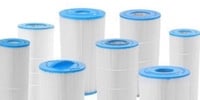
Cleaning Cartridge Filters
Be advised that with time or many seasons,
cartridge type filters will get plugged with oils, if you cannot get the
cartridges to a respectable state of cleanliness you should replace them. We
offer just about any cartridge that you may need and can ship these out quickly. Visit our article on
choosing the correct replacement filter cartridge. Having an extra set of cartridges on hand is a smart practice. If you need a
set right away because your pool is getting cloudy, waiting several days for
replacements could result in a pool full of algae.
- After you have removed the cartridges from your filter
and manifold assemblies, use a nozzle on your garden hose to blast away the
heavy muck.
- Once you are down to the fabric, use the nozzle at close range to blast away the impregnated dirt within the pleats.
Start at the top of the cartridge and work down the pleats.
- When you think the
pleats are clean, turn the cartridge upside repeat the same process.
- If you think you've gotten the cartridges to a respectable level of clean, you can reinstall them.
- If not, soak them overnight in a cleaning
solution.
Soaking dirty cartridges overnight in a
container with a cartridge cleaner like the ClearView Filter AID or TSP will help. Be sure to rinse
your filters well after a soaking in a cleaning solution.
Your filter needs to have a working pressure gauge on the top. Take note of the pressure reading on the tank with a clean filter and store that information somewhere you can reference later.
Tips for Filter Maintenance and Cleaning
Why did you need a working pressure gauge and to
write down your tank pressure? As your filter works it will pick up debris,
body oils, sunscreen, etc. When your filter gets clogged and dirty, it gets
resistant to water flow and as a result the pressure reading on the gauge will
go up. A rule of thumb is when the pressure is 5 to 8 pounds higher than when
it was clean, then it’s time to backwash the filter and/or manually clean.
Got algae?
When
cleaning up any filter that is congested with algae, soaking it in a solution
of chlorine is very helpful to break down the algae.
Many of you use
calcium hypochlorite as a shock and an everyday source of
chlorination, it’s inexpensive and it works well. The downside of using this
product is the fine calcium powder which forms in filters and causes them to
plug up. In order to get the calcium off of sand, grids and cartridges you may
need to soak them in an acid solution of 20% muriatic acid to 80% water. Always add chemicals to water.
Don’t forget the O-ring!
Having a replacement O-ring on hand is being
smart. You never know when your pool filter is going to need a manual clean.
Filter tanks always assemble easier with a new O-ring.
Never use a petroleum-based lubricant like
Vaseline on any O-ring or seal. Petroleum products will deteriorate these
rubber type products.
Aladdin’s Magic Lube is perfect
for your pool and spa applications. If these are not available dishwashing
detergent or WD-40 will suffice.
A light coating of Magic Lube on your tank O-rings
and especially your pump lid O-ring, helps create an airtight seal. When used
on the nipples of D.E. grids it allows for easier disassembly and helps
eliminate broken grids.
Re-assembly
When you assemble the filter halves together be
sure both halves of the tank are clean, this is especially true with D.E.
filters.
After you assemble the filter together, make
sure the air relief valve is OPEN before you turn on the pump. Water as it
enters the tank compresses air which is dangerous. Water doesn’t compress, so
you will eliminate a potentially dangerous situation as your filter fills with
water.
Want to reduce cleaning frequency?
If you're ready to replace your current filter, the
Waterco Dual Stage Filtration System includes the MultiCyclone pre-filter and a second stage Cartridge Filter. This whole system is priced competitively and is an unbelievable system.
Many of our staff have decades of experience,
we’re open 7-days a week, call us, we’re here to help!