 |
1. Set-up and prep:
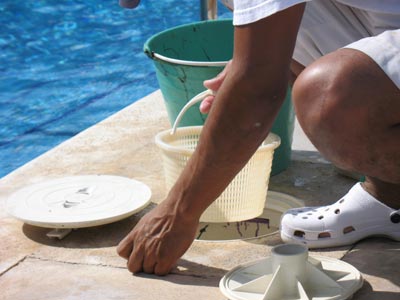
Begin by surveying the area and removing any debris that may obstruct proper equipment function. Clean out leaf traps, baskets, and filters, and ensure your equipment is correctly assembled.
Remove any winterizing plugs and discharge any antifreeze liquids installed during pool closing from the return lines or skimmer. Then, remove leaves, debris, and water from the cover. Depending on how much water is on your cover, you may need a pool cover pump to help siphon off the excess water.
|
|
2. Remove, Clean & Store Your Pool Cover: With your pool cover and surrounding areas free and clear of water and debris, it’s time to remove the winter cover from your pool. Once removed, take some time to rinse and clean your pool cover and check for any damages. Allow it to air dry before storing it away for the season.
Proper storage is key to ensuring your pool cover lasts a long time. Store it out of sunlight in a cool, dry place to prevent UV deterioration, mold, and mildew. Take special care to fold it so that there are as few creases wherever possible.
|
|
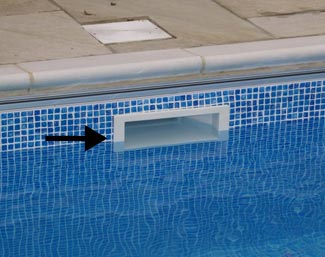 Proper water level
|
3. Inspect Your Pool & Refill Water:
With your pool cover off, it’s time to thoroughly inspect your pool. Check for damage, liner tears, staining, and buildup. If you notice staining or discoloration, consider running stain and scale prevention pool chemicals through the pump after it’s primed and running without issue. Then, fill your pool back to a normal water level.
This may take some time, depending on how much water was removed at the end of the season. While your pool fills, scoop out any leaves or dirt that may have accumulated over the winter months.
Pro Tip:One seemingly insignificant issue in one area of your pool’s filtration system or operating equipment can lead to larger issues down the road. If you notice that any part of your equipment or filtration system seems to be lacking power or not operating correctly, fix the problem before continuing on with the pool opening process.
|
|
4. Inspect & Connect Pool Equipment: Prime your pool pump before reconnecting and firing up the equipment. Ensure all air is flushed out of your plumbing and system by opening the air relief valve on your filter. Failure to do this can cause significant damage to your equipment because of all the compressed air built up. Inspect your system for any leaks or cracks.
|
|
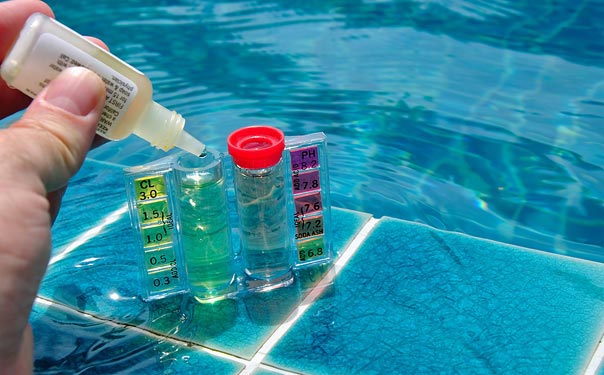 |
5. Test & Balance Your Pool Water: Proper pool water chemistry is critical to swimming safety and conditions. Without knowing the proper amount of each chemical to add, you can do significant damage and or stain your pool surface. Our step-by-step pool opening kits make it simple to balance your water to the right levels.
We highly recommend taking your water sample to your local pool professional to get the most accurate reading before experimenting with chlorine and acid levels. It’s also a good idea to let your water circulate a few hours before testing to allow the added water to mix in with the water already in the pool. Use pool test strips for regular water testing and maintenance throughout the season to monitor your calcium hardness, pH, total alkalinity, chlorine, and more.
Here is a list of recommended pool chemistry levels:
|
|
6. Brush & Vacuum: Before you can get to swimming, your pool could use a good scrubbing. Take this time to brush and vacuum your pool to loosen up and remove any lingering dirt and debris.
|
|
|
7. Add Pool Shock: With all the hard work you’ve put into opening your pool, take the extra step to keep algae, bacteria, and other contaminants at bay with pool shock. Doing so will help kill off any lingering contaminants that can cause sickness and buildup and help reduce the amount of time spent scrubbing away algae or buildup.
|
| comments powered by Disqus |
